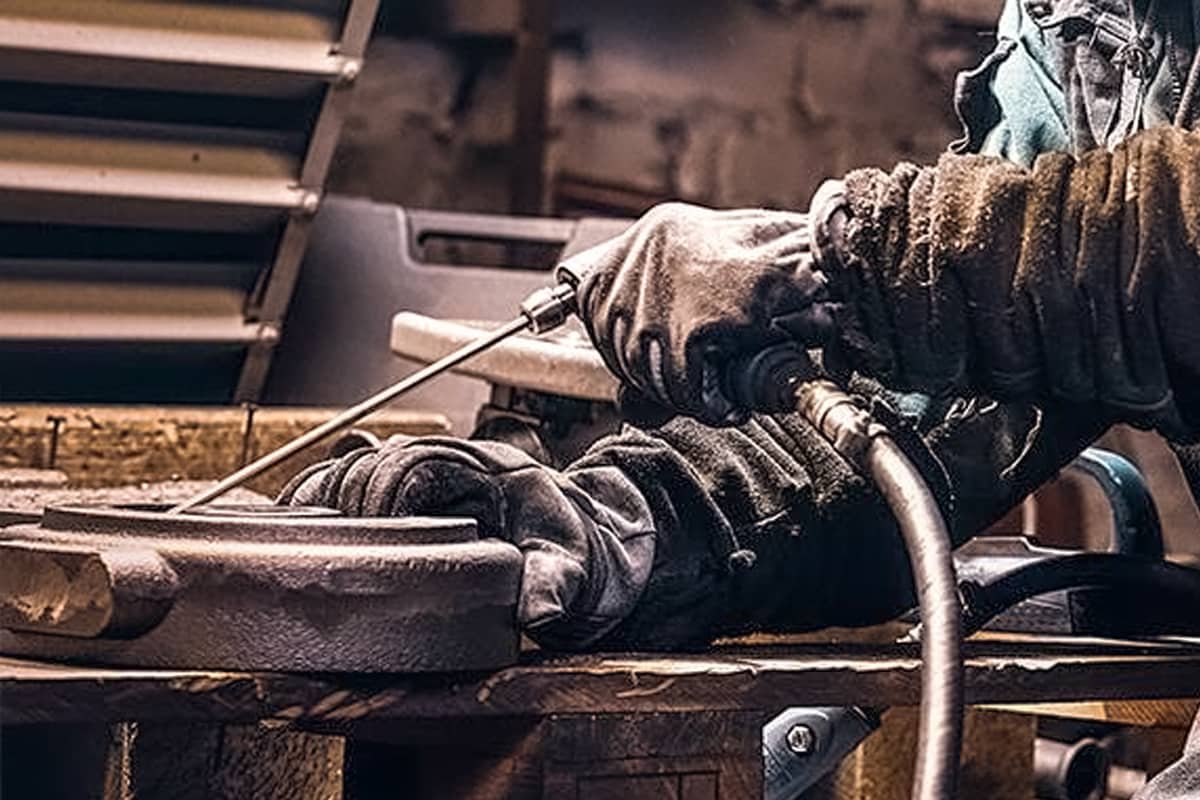
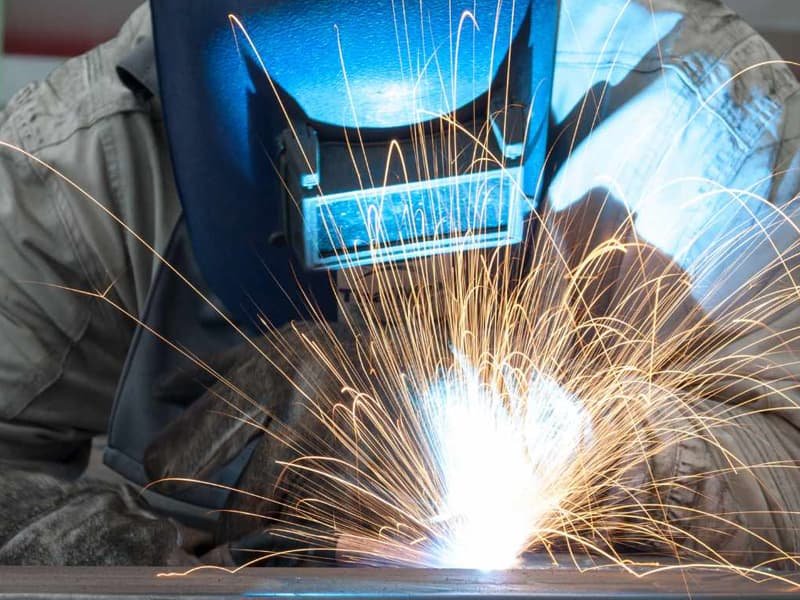
Welding is an art that demands patience, precision, and practice. But even with the best tools, beginners often end up frustrated when their welds look messy, weak, or uneven. The good news? Most welding flaws stem from a handful of avoidable mistakes. Below, we’ll explain five common welding flaws, why they happen, and how to fix them with practical, step-by-step solutions.
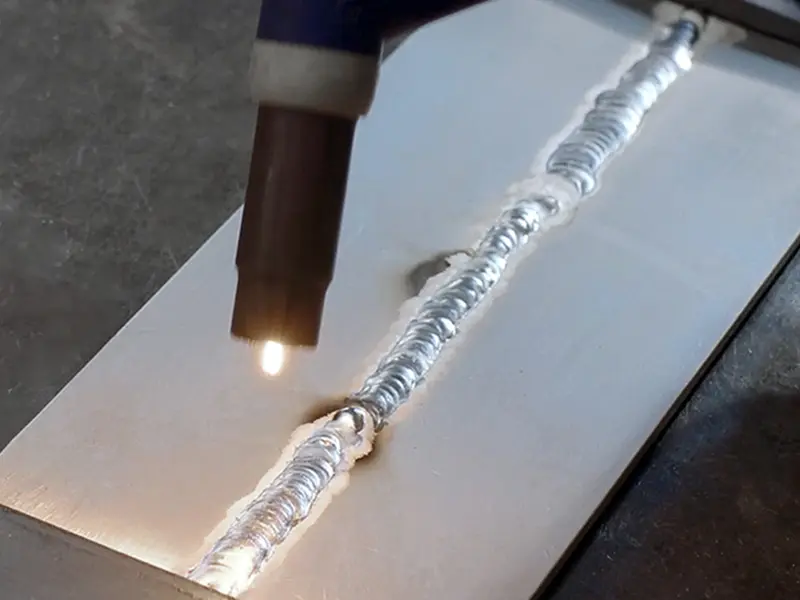
Bubbly, Sponge-Like Welds (Porosity)
What it looks like: Tiny holes or pits scattered across the weld bead, resembling Swiss cheese.
Why it happens: Porosity occurs when gas (like oxygen, nitrogen, or hydrogen) gets trapped in the molten metal. Common culprits include:
- Dirty base metal (rust, oil, paint).
- Contaminated shielding gas (leaky hoses, wrong gas mix).
- Moisture in electrodes or filler rods.
How to fix it:
- Clean everything twice. Use a wire brush or grinder to remove rust, oil, or paint from the metal surface. Wipe down with acetone if needed.
- Check your gas setup. Ensure gas hoses are airtight, and use the correct gas blend for your material (e.g., 75% argon/25% CO₂ for mild steel).
- Store electrodes properly. Keep them in a dry, sealed container to prevent moisture absorption.
Pro tip: If porosity persists, reduce your travel speed. Moving too fast prevents gas from fully shielding the weld pool.
Uneven Edges That “Bite” Into the Metal (Undercut)
What it looks like: A groove or notch along the edges of the weld bead, weakening the joint.
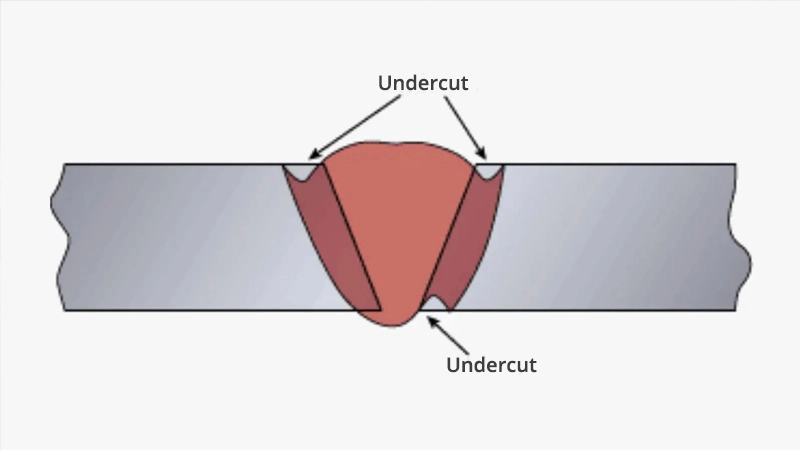
Why it happens: Undercutting is caused by excessive heat or incorrect torch angle, which melts the base metal’s edges without filling them properly.
How to fix it:
- Lower your amperage. High heat melts the base metal too aggressively. Start with 10% less current and adjust as needed.
- Adjust your torch angle. Hold the torch at a 5–15° drag angle (tilted backward) to direct heat into the weld pool, not the base metal.
- Use a weaving technique. For wider joints, move the torch in a slight zigzag pattern to distribute heat evenly.
Pro tip: Undercut often appears on vertical or overhead welds. Practice on flat surfaces first to build control.
Cracks That Split the Weld (Hot or Cold Cracking)
What it looks like: Hairline fractures in the weld bead or adjacent metal.
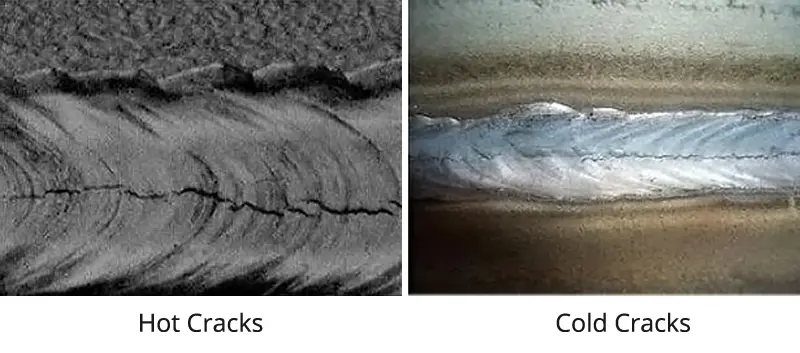
Why it happens:
- Hot cracks: Form as the weld cools, usually due to impurities (like sulfur in steel) or improper filler metal.
- Cold cracks: Appear hours/days later, caused by hydrogen trapped in the weld (from moisture or contaminants).
How to fix it:
- Match your filler metal. Use a filler rod with higher ductility (e.g., ER70S-6 for steel) to absorb stress as the weld cools.
- Preheat thick metals. For materials over 6 mm thick, warm the base metal to 150–200°C before welding to slow cooling.
- Bake your electrodes. Hydrogen-containing rods (like E7018) should be stored at 120–150°C to remove moisture.
Pro tip: Avoid quenching welds in water. Let them cool naturally to prevent rapid contraction.
Weak, Incomplete Fusion (Lack of Penetration)
What it looks like: The weld sits on top of the joint without bonding deeply into the base metal.

Why it happens:
- Too low amperage or fast travel speed.
- Incorrect joint preparation (e.g., tight gaps with no bevel).
How to fix it:
- Increase amperage by 10–15%. More heat ensures the weld penetrates the base metal.
- Slow down. Hold the torch in the weld pool for an extra half-second to let the arc dig deeper.
- Bevel thick edges. For metals over 3 mm thick, grind a 30–45° bevel to create space for proper fusion.
Pro tip: Test penetration by welding a T-joint, then cutting it crosswise. A good weld will fuse fully into the corner.
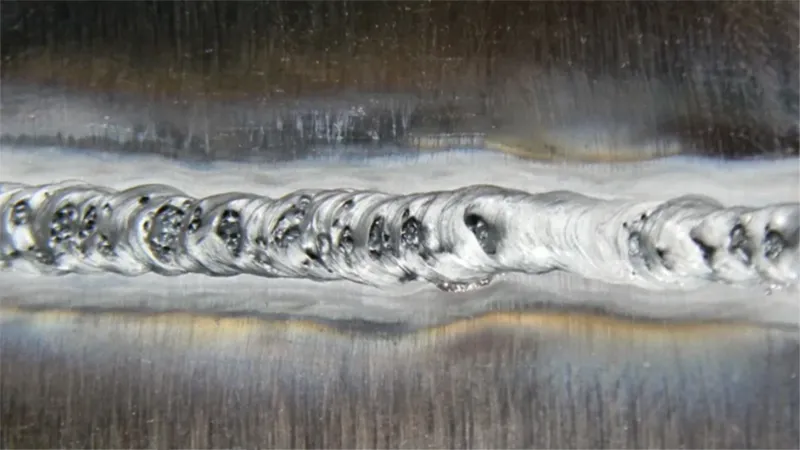
Lumpy, Inconsistent Beads (Poor Arc Control)
What it looks like: The weld bead is wavy, too tall, or unevenly spaced.
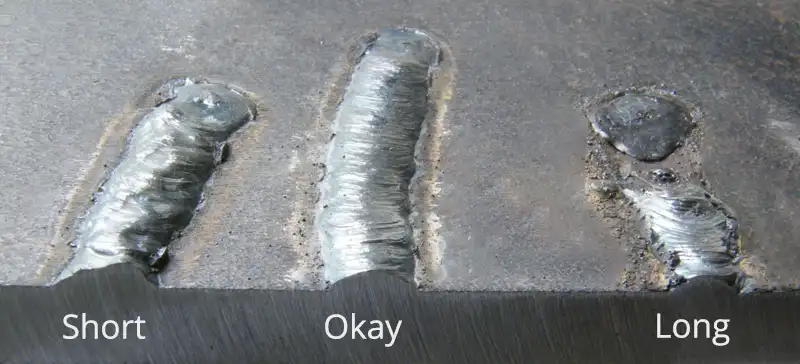
Why it happens: Inconsistent travel speed, unstable arc length, or incorrect wire/rod feed.
How to fix it:
- Maintain a steady arc length. For MIG welding, keep the tip 6–10 mm from the workpiece. For stick welding, aim for 2–4 mm.
- Practice “trigger discipline.” Avoid stopping and starting mid-weld. Use scrap metal to build muscle memory.
- Adjust wire feed speed (MIG). If the weld sizzles and sputters, increase the feed. If it birdsnests, decrease it.
Pro tip: Mark your travel path with soapstone to stay straight. Focus on pushing the pool, not chasing it.
Final Thoughts
Great welding isn’t about fancy equipment. It’s about mastering the basics. Start by tackling these five flaws, and you’ll see dramatic improvements in strength, appearance, and confidence. Keep a log of your settings (amperage, gas flow, travel speed) for each project, and don’t hesitate to re-weld problem areas. Remember, even pros make mistakes; the difference is knowing how to fix them.